
S-100 Schnellboot by Italeri

The Reichsmarine
was renamed Kriegsmarine on12.03.1935. She owned at this point in time
S-Boats "S 1" through "S 8", which were organised in
the 2. S-Boat-Halvflotilla. Also Tender (Begleitschiff) "Tsingtau"
was subordinate to it. On 12.06.1935 " S 9" was commissioned and
the unit was renamed 1. S-Boat-Flotilla ( 1.SFltl). The boats "S
10" through "S 13" also joined.
The boats
from "S 100" on were from the outset constructed with Kalotte.
The type "S 100" wasequipped with the newly developed Diesel MB
2500 with 2500 HP. From "S 219" on the boats obtained a bigger
tank capacity for a range of 750 nm. For the boats"S 301"
through "S 305" the new MB 518 Diesels with jet-induction were
planned, which however were not installed due to delivery problems.
After this short story regarding the fast boats I want to present the model of Italeri
. While unboxing the model , I was surprised by it's vast size which was , of course my main motivation in order to convert it to rc . The secont motivation was , trully that the model and the original was a beautiful shaped craft. The box was opened and I saw extremely big cards full of small and big items . The most impressive were the two sides of the hull . I test fitted them and saw that Italeri did a very good job there. The only part that would need some attention was the plate that accomodated the rudders far below the back of the model .
THE CONSTRUCTION


Here you may see the hull ready . I test fitted the deck (front and back ) many many times . By that days I trully was not sure how to arrange the access holes on the deck without destroying the lines of the model

A more close look of the rudders and you may see the main rudder , the Luhrsen rudders and the three shafts.

Here is the link from Italeri : Italeri Crew


I have now figured out how to arrange access holes . I wanted acces for the rudders , the motors , the battery and the electronics compartment .The far aft hatch is glued temporarily in place with silicone . By this way , if I need access there I can remove it with a small screwdriver and install it again then .


The very interesting photo-eched parts are glued in place . They give a rather realistic view . A good addition to a glorious model which is in the box of the kit (not aftermarket )


The torpedoes as shown in a very nice photo from a website . These days I imagined that I could achieve is very nice painting.
The HULL is painted here . Off White and Insignia red plus a black waterline. Unfortunately I used acrilic spray painting and not my beloved enamel . This added much strenght to the whole construction against peeling and scratching BUT I lost many points regarding scale looking . Your comments ..
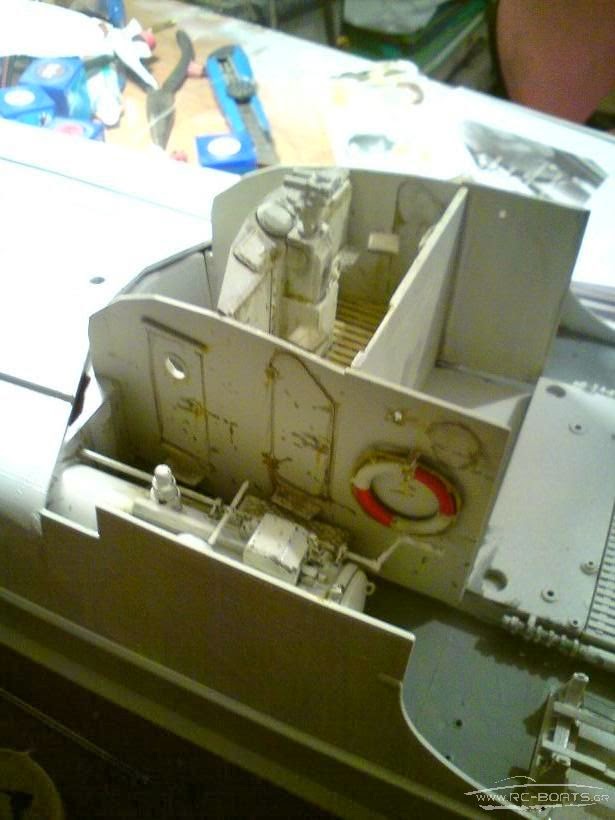
A nice view of the superstructure . See the two "teeth" that are made of styrene sheet. They are used to hold tight the middle hatch-deck.
Painting the middle deck ...
the small round windows are masked with Maskol .
Heavy weathering and chipping ... your comments ..
The railings are under preperation . I threw away the plastick ones and used brass ones from Robbe . Thois way I am pretty sure that they will not start bending and cracking !
I drill holes for the railings
Detailing ...
More Detailing ...
The crew at the final positions . I could not paint them so I sent them to a good friend of mine who did a very very good job !
Captain.... ??
As the model meant to be rc .. and it is ... I wanted to tranport it safely so I built a wooden box made of 6mm plywood .
Δεν υπάρχουν σχόλια:
Δημοσίευση σχολίου